
I thought I would share a little information about how I setup my NFT (Nutrient Film Technology) systems for growing my cucumbers and tomatoes this year, It’s a few weeks since I’ve done this so you can see how the plants are getting on at the bottom of the post.
I use two sets of channels each year, One for the cucumbers and one for the tomatoes. The tanks themselves consist of a bottom tank made of plastic, Which then has the channel where the nutrient flows layed on top of the tank. The nutrient is pumped from underneath into the top channel and then flows down the channel where it re-enters the bottom tank. Unlike using a nutrient method with lot’s of pipes there is very little risk of leaks using this method as it’s all self contained.
 As you can probably see in this picture I’ve already got the nutrient being pumped into the channel ready for the plants, I do this so that the system has a day or two for the nutrient solution to properly mix and settle. So I can take a proper reading of the pH level and the nutrient concentration level. These are probably the most important things in hydroponic growing so I check these and adjust them regurlary. After growing for a few years you seem to get a feeling of how the nutrients and pH levels increase or decrease when the plants are using more or the nutrient’s need changing.
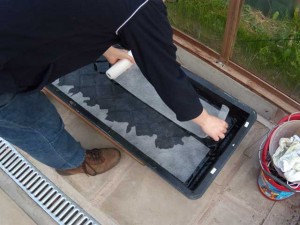
 The photo shows me laying the spreader mat into the nutrient channel. This matting helps spread the nutrients evenly over the channel and also possibly gives the plant roots something to grab onto while they are growing. After the plants have finishing growing the for season this whole mat is about 1 inch thick with roots.
 These channels usually come with a piece of correx which covers the whole channel, But with these channels being so big I found the correx to be too flexible and quite expensive if you change it each year.
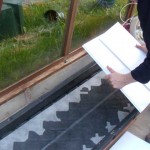
If you’ve read my strawberry blog posts you’ll know I’m using wall cladding this year which is very stiff and easy to get hold of. After cutting the lengths of cladding to the width of the channels I then slot them all together as you can see in the photo’s.
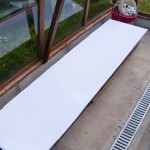
 The cover is now all ready for cutting out so I can put the plants into the system, I marked the squares out on the plastic sheets where I want to put the plants and used my Dremel multitool to cut them out. The good thing about using slot together sheets is that I can very the layout of the hole’s each year if I want a different kind of spacing between the plants.
The picture below is what the final product looks like, and one of the plants nearly ready to be transplanted showing all the abundant roots. The plant is growing in something called a rockwool cube. I will create a full blog post soon detailing exactly how I propagate my plants from seed.


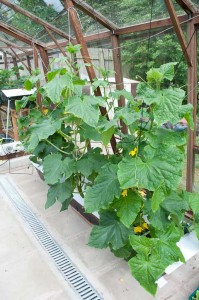
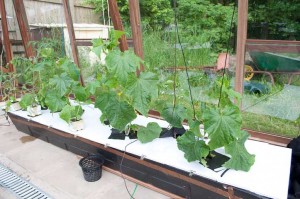 I’ve had both the cucumber and tomato systems running now for about 4 weeks, This picture shows what the cucumber system was like after about 2 weeks.
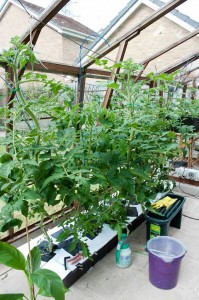
 This is what the tomato system and plants were like after 2 weeks.
And the photo’s below show what the systems are like now after about 4 weeks, There are already lot’s of cucumbers and tomatoes growing and we had the first cucumber at the weekend.
Nothing beats freshly grown produce from your own garden. Yum 
Pingback: Configurando o pepino e tomate Sistemas NFT | Cono Sul Hidroponia Brasil
Hi Paul, very interesting site. What nutrients are you using for the tomatoes, and also for your lettuce and the strawberries. I’m finding it really hard to find anything that isn’t specifically for growing naughty plants and really quite expensive. Many thanks! Jim.
Glad you like the site, I know what you mean about the nutrients. I actually investigated making my own this year by purchasing all the minerals individually but it was even more expensive. This year I’m going to use General Hydroponics Flora Nutrients, It’s a 3 part set which gives you lot’s of flexibility and seems to be the most economical nutrients I can find. I always get them locally to avoid postage costs. If you get the larger ones it’s cheaper as well.
Thanks Paul,
on doing some digging I see the same people do “floraMato” especially for tomatoes, lettuce, strawberries etc.
I’ll probably give that a go.
I don’t think it’s a lot cheaper though!
JIm.